Enable Listings
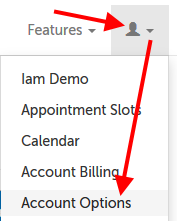
1. While logged in as an Account Administrator, click on the profile tab (head/shoulders icon) and select "Account Options" from the drop-down menu.
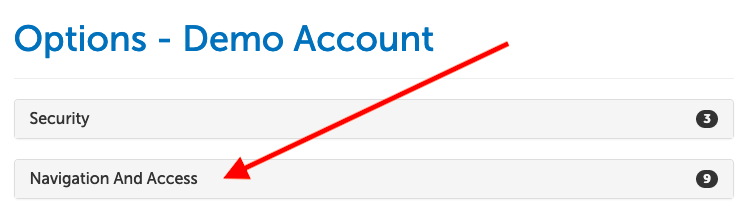
2. Click on the "Navigation and Access" section to expand it.
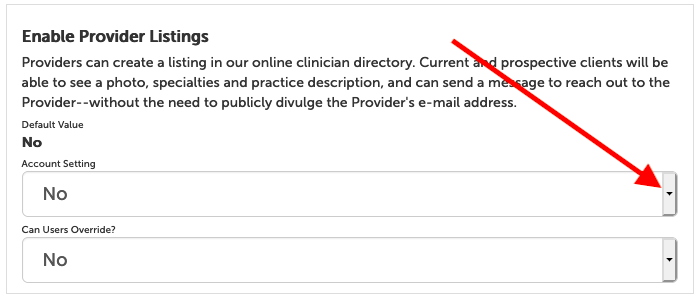
3. Scroll down to the "Enable Provider Listings" option and change the setting from "No" to "Yes". The change will be saved automatically.
Create a Listing
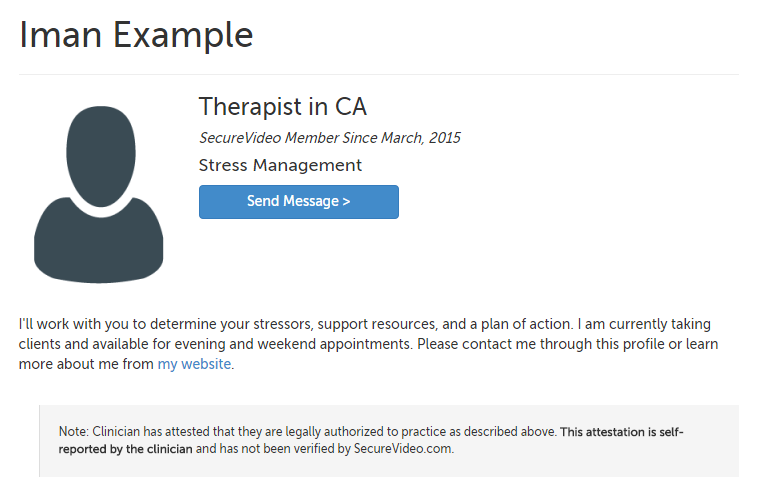
All SecureVideo account holders can create a listing in our online clinician directory, although listings need to first be enabled on the account by an Account Administrator. Prospective clients will be able to see your photo, specialties and practice description, and can send you a message to reach out to you--without you needing to divulge your e-mail address publicly.
The listing also appears below your availability on your public calendar page if Appointment Slots are enabled.
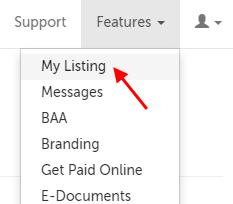
1. Click on the "Features" tab in the upper right hand corner, and select "My Listing" from the drop-down menu.
2. Use the "Create Listing" button at the bottom of the page.

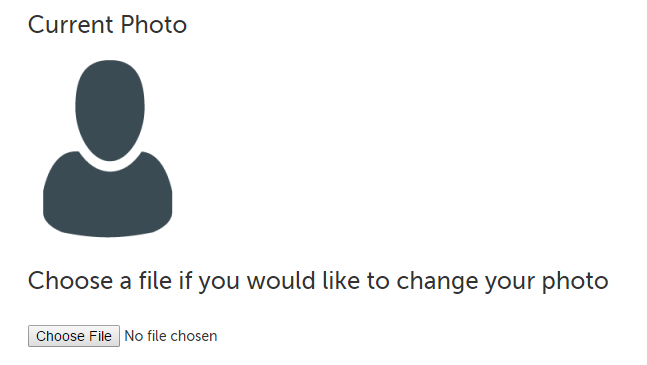
3. On the next page, use the "Choose File" button to select the photo you want to use for your profile. (The photo will be uploaded once you save your listing.) Photos should be 200 pixels by 200 pixels in size; if they are larger, we will reduce them such that the larger dimension is 200 pixels. The file format should be a GIF, JPG, or PNG--please contact [email protected] if you need help converting any file format.
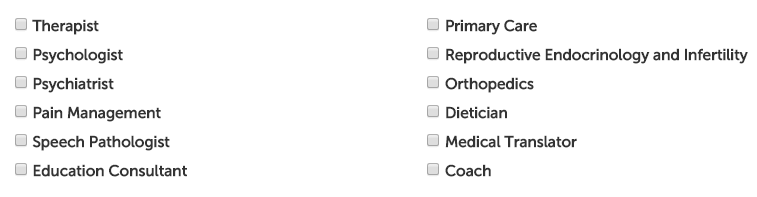
4. Select your practice type by checking the box next to an available option.
5. States, Territories, or Provinces Where You May Legally Practice: Use the checkboxes provided to note which states/territories you may legally practice. It is your responsibility to accurately indicate the states, territories, or provinces where you may legally practice.
6. Licenses, Certifications, and Other Credentials: Please enter the details of any licenses, certifications, or other credentials that are relevant to this listing.
7. Practice Specialties: Use this text field to describe your practice specialties.
8. Practice Description: Use this text field to describe your practice.
9. Use the "Apply" button at the bottom of the page to create your listing (or to save any changes).

You can also remove your listing using the "Remove Listing" button. (This will remove your listing from the directory, but your photo and information will be saved if you ever want to reinstate your listing.)
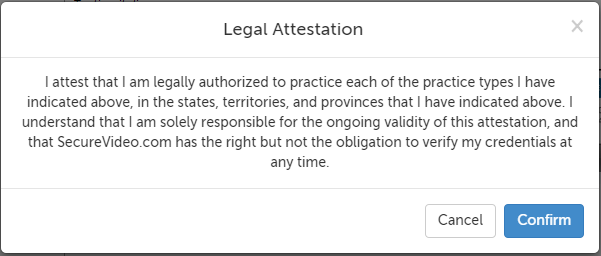
10. A popup will appear asking you to confirm your licensure in the states/territories you indicated.
Using the Messaging Feature
Your directory listing is public, so that any person visiting your profile may use the Send Message feature to send you an encrypted message. Should someone send you a message, you will receive an e-mail alert letting you know that you have a message, and that you need to log into your account to read it. (Messages sent in reply to text message invitations are also stored here in encrypted form.)
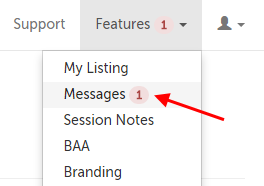
To retrieve a message, click on the "Features" tab and select "Messages" from the drop-down menu.
This article was last reviewed by our Support team on March 27, 2020.